
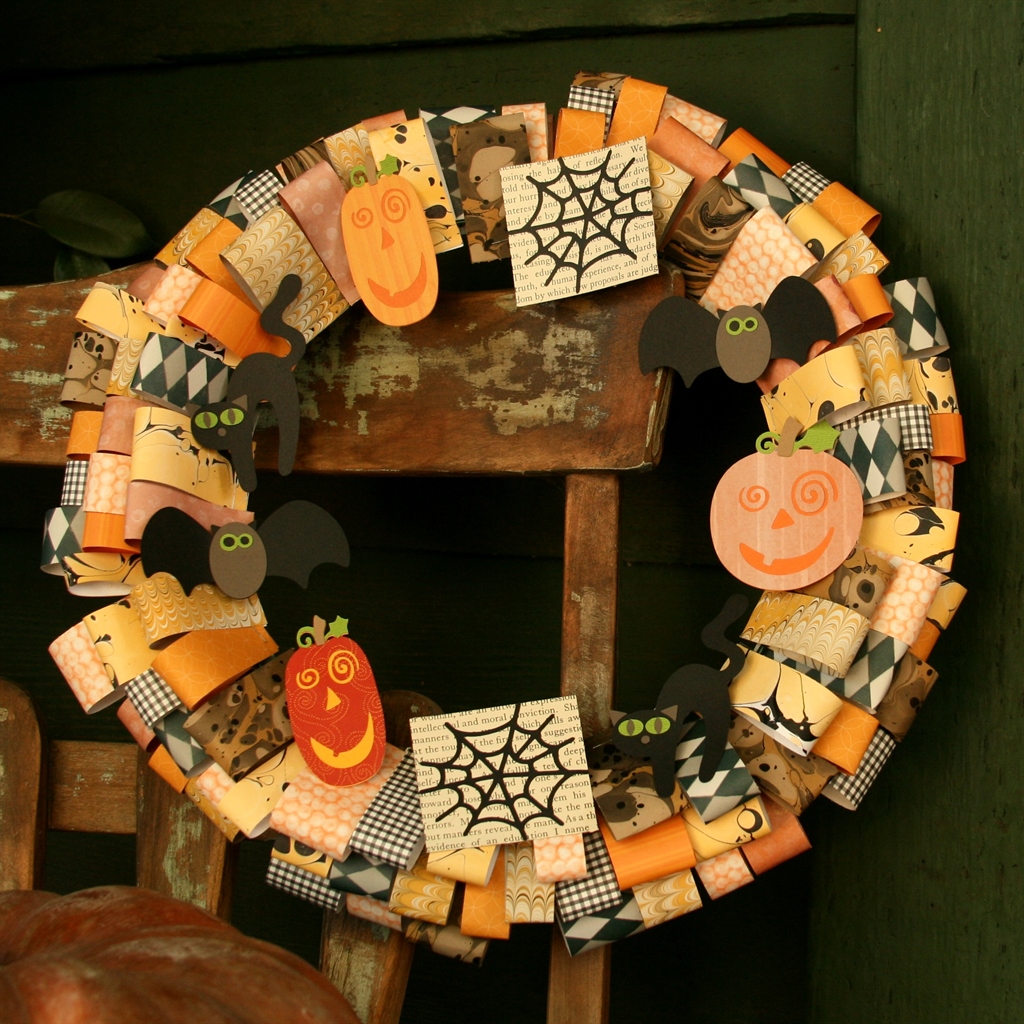


Decorating my front porch for the fall season is one of my favorite activities. The air is cool and crisp and one holiday blends into the next so it is easy decorating before Christmas is upon us. I like easy. The Halloween Paper Ribbon Wreath has a timeless appeal and you can display it for years to come.
Gather the following tools and supplies to create the Halloween Paper Ribbon Wreath:
(These next 4 links are affiliate links which means I get a commission if you purchase through me.)
- Ultimate Card Making Tool Kit
- Cricut Chic and Scary cartridge
- 12″ wire wreath form
- old book paper
- patterned paper
- colored cardstock
- tape runner
- glue pen
- hot glue gun
- stapler
- thin chipboard (cereal boxes are a nice alternative)
- Cut strips of patterned paper in various sizes ranging in width from .75″ to 1.25″ and 5″ in length.
- Loop the strips around the wire form using the stapler and keep adding until you have finished the wreath.
- Using the hot glue gun, glue each strip to each other to provide strength and even out the layering.
- Decorative images vary in size depending on which image you choose. To create each one, cut out the image using the Cricut and assemble using an appropriate adhesive. Adhere each image to scrap pieces of chipboard for stability. Adhere to the cross bands to complete the wreath.
- Hang your Halloween Paper Ribbon Wreath masterpiece.
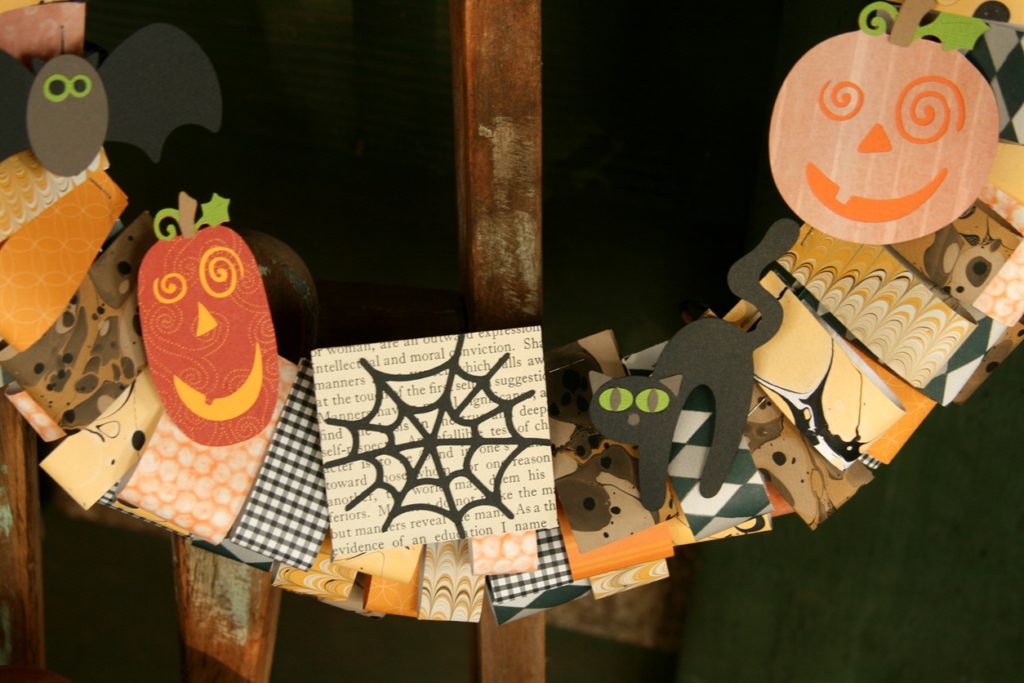

To create this wreath, I used an old wire form leftover from Christmas. This form had cross bands of wires sticking out that needed to be covered up and that is where I attached the decorative images. If your form doesn’t have the crossbands, then you can attach the images on the inside wire ring. Separate the paper ribbons slightly so the images looked tucked into the wreath. The same images for this wreath can also be found on the Mini Halloween Garland.
The marbled paper came from my stash as I was fortunate to take paper marbling classes from Barb Skoog. These marbled papers blend well with the others and give the wreath an updated vintage look that is perfect for my Craftsman Bungalow porch. This wreath can take on different looks depending on the papers and images you choose.
Meet me back here for more Halloween goodness as you still have time to create and decorate. Be creative!

Editor’s note: I created this Halloween paper ribbon wreath using the Creative Memories Cheerful Seasons cartridge (pumpkin with vine), Creative Memories This & That cartridge (bat, black cat, and spider web), and Cricut Stretch Your Imagination (jack o’ lantern). The Chic and Scary cartridge is a suitable alternative.
SaveSave
SaveSave
SaveSave
SaveSave
SaveSave
SaveSave
SaveSave
SaveSave
SaveSave