
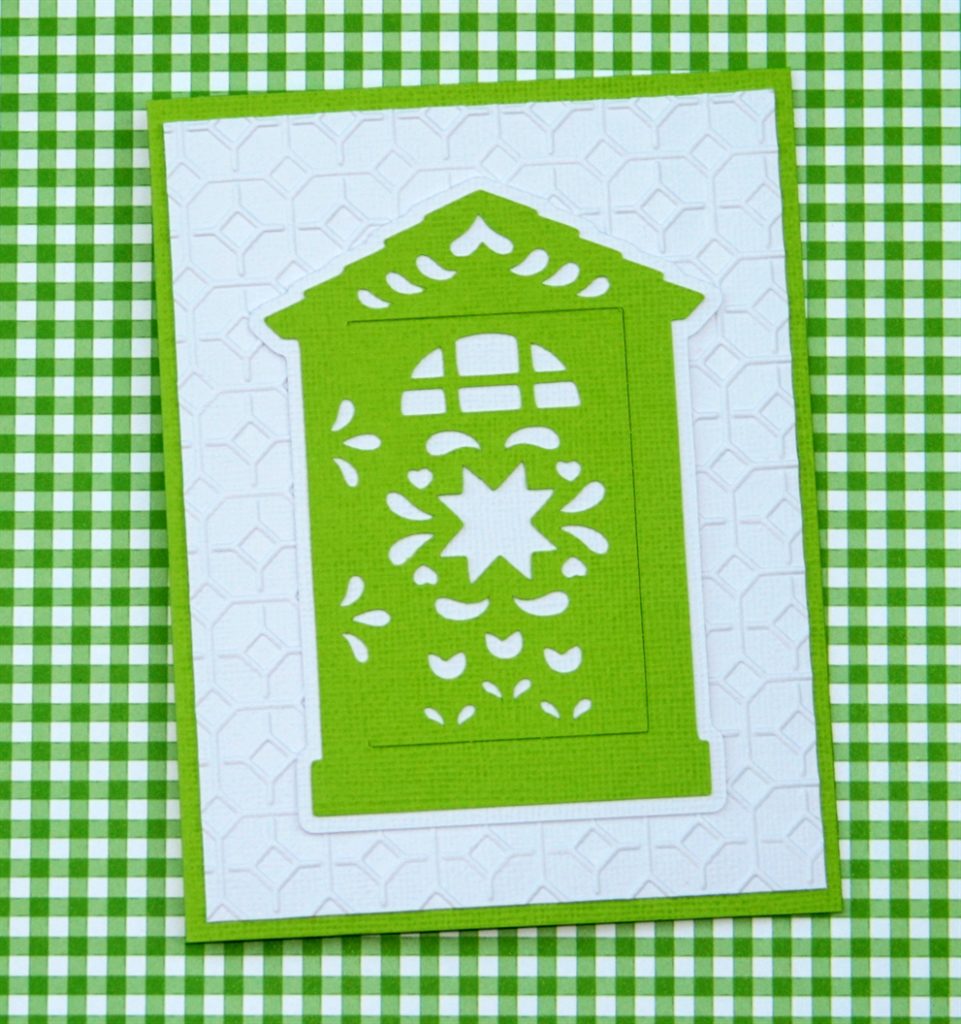


This Folk Art Door Card was created to welcome a new teammate. I wanted a bright and cheerful card that could be displayed on her desk. This card definitely fits the bill.
Gather the following tools and supplies to create the Folk Art Door Card:
(These next 2 links are affiliate links which means I get a commission if you purchase through me.)
- Ultimate Card Making Tool Kit
- Cricut Folk Art Festival cartridge
- embossing folder
- cardstock
- adhesive
- mini tape runner
- Fold the lime green cardstock so it is a finished size of 4.25″x 5.5″ and cut the white cardstock to 5.25″x 4″.
- Fold the lime green cardstock in half lengthwise and use the bone folder to crisp the edge.
- Run the white cardstock panel using the embossing folder through the Cuttlebug machine.
- Cut all of the pieces for the door at 4″ high.
- Adhere the door layers together using the mini taper runner.
- Adhere the door to the embossed cardstock using adhesive.
- Write your sentiment and mail or gift the Folk Art Door Card.
Such a simple result with so much impact and a colorful addition to the workspace. I really love using the Folk Art cartridge for these types of cards because the designs are sophisticated and not too fussy or cute. Clean and simple. Love it!


Editor’s note: This post was originally published in November 2014 and has been updated for freshness, accuracy and comprehensiveness.
Remember to Pin it!